Tracking Control Center
Account
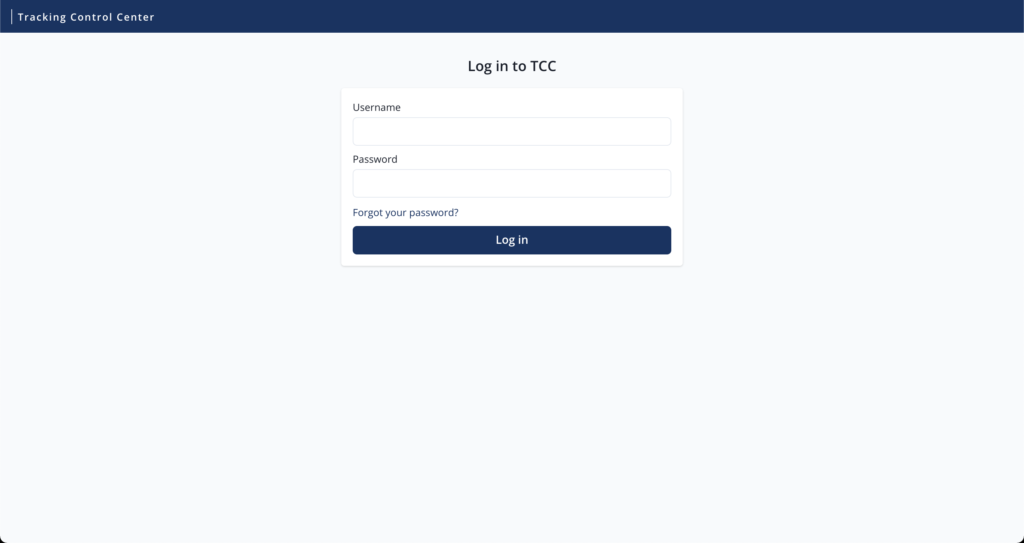
You will receive an invite for the Tracking Control Center via email. This email contains a link to set up your account. You’ll be asked to provide a password as well as setting up Two-Factor Authentication (2FA). For this you can use Google Authenticator or any other authenticator app.
After registration you can go to https://tcc.versa.company to login.
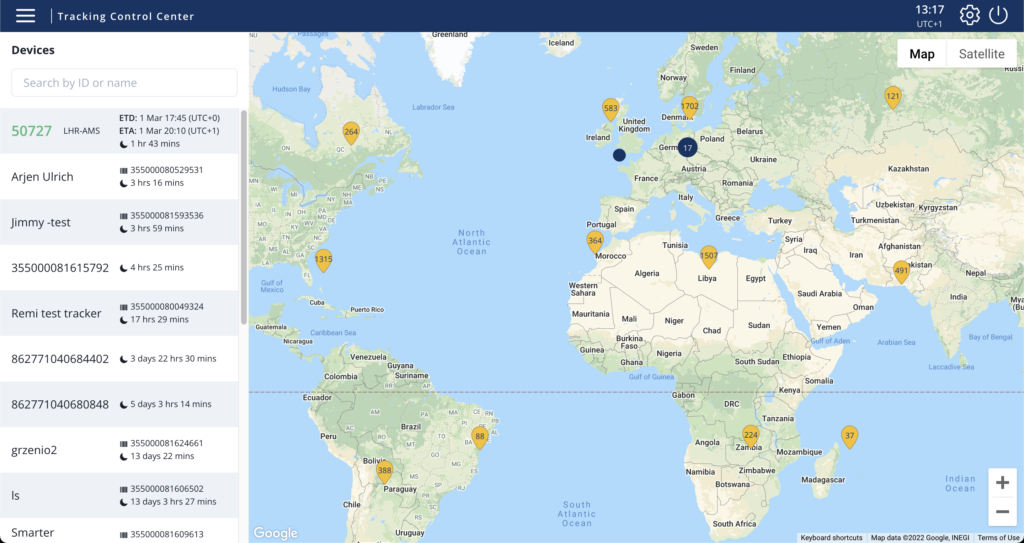
Device overview
The main overview shows a list of devices on the left. This list is a reflection of what the world map shows. When you zoom in, you’ll notice that the list of devices becomes shorter.
You can use the search bar to find a device based on ID or name.
The information shown for a device in this list is based on the information available. For example, if a device is given a name, the name will be displayed instead of the device ID.
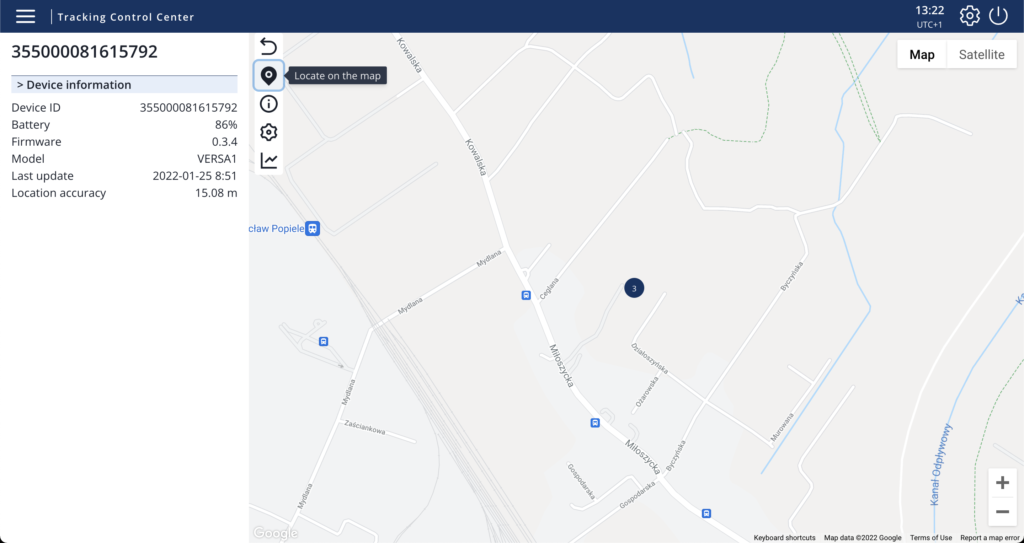
Device details
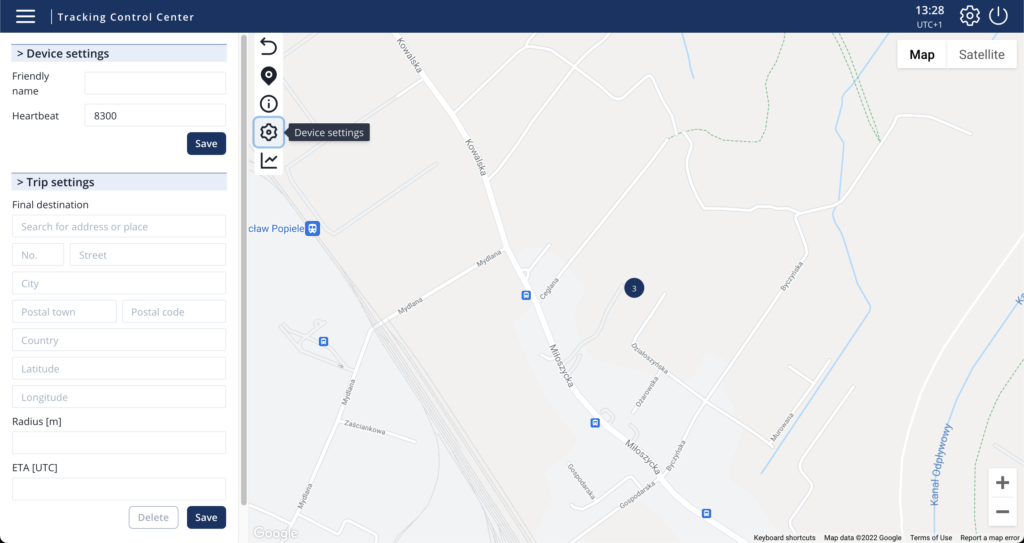
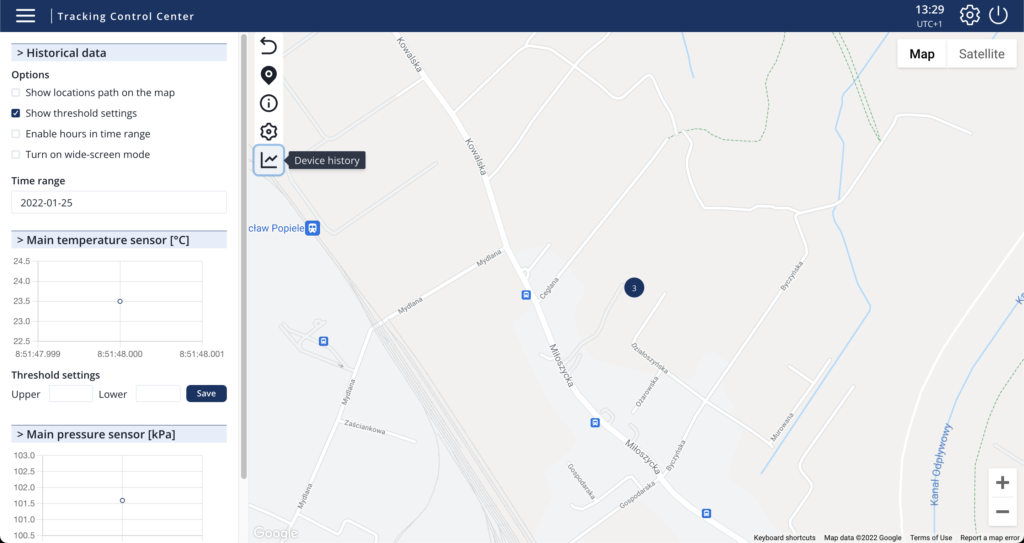
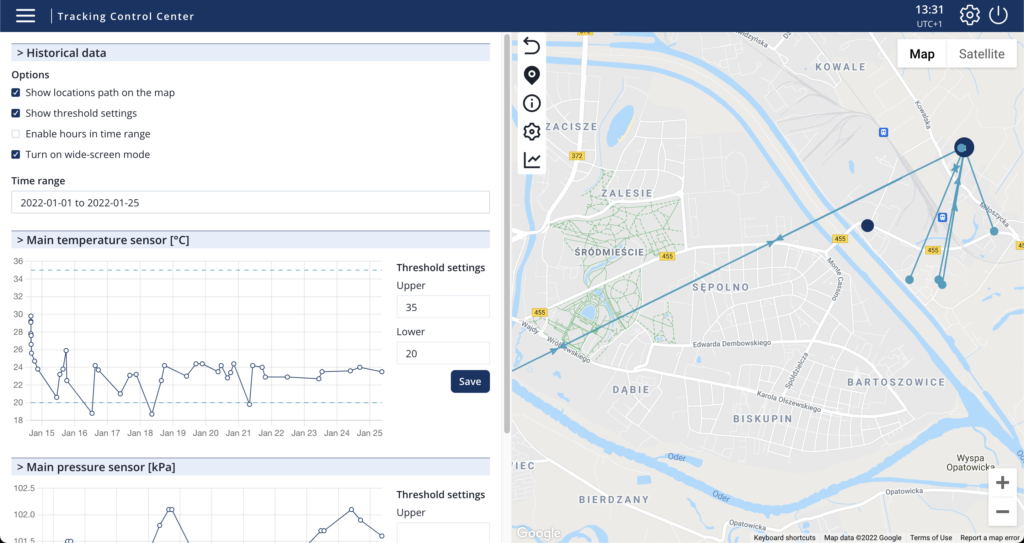
The device details show you the basic information about the device. The menu on the right of it allows you to click through additional information.
- Arrow: return to device list
- Location marker: zooms in to the location of the device
- Information icon: shows the basic information of the tracker
- Gear icon: lets you change the settings of the device and trip
- Graph icon: provides insight in the sensors of the device and lets you set the sensor thresholds
Sensor data
This view shows you sensor data based on the time range selected. The options allow you to:
- Show locations path on the map
- Show threshold settings
- Enable hours in time range
- Turn on wide-screen mode
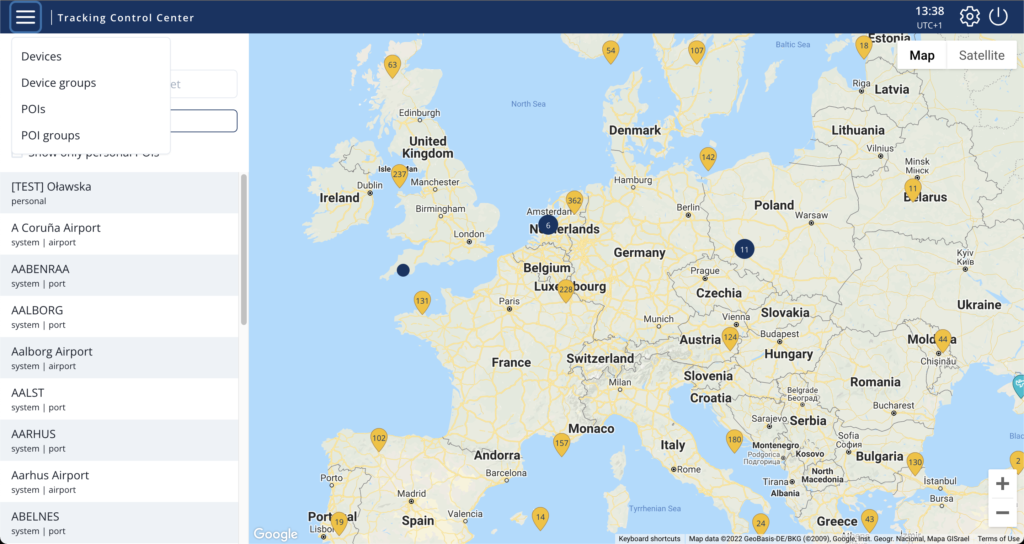
Points of Interest
In the drop down menu on the top left you can select POIs (Points of Interest). These include, amongst others, all airports and harbours in the world, based on which the location update frequency can change.
You can add your own POI by clicking ‘Add new POI’.